Ruins of Originia Walkthrough
Ashes to Ashes
"There are some ruins only a few days travel toward the southwest..."
TABLE OF CONTENTS (click a topic to jump to that section)
- Locating the Museum of the Ancients
- Exhibits 13, 14, 15, 16 and 24
- The Corpse of the First Builder
- Picking up Souvenirs
- Final Objectives
Starting Objectives:
- Locate the caverns in the crater
- Once you locate the ruins find a way inside
- Don't lose the Gem of Oldorf
- Gather at least 7500 worth of loot
- Climb out of the crater when done
- It's be nice to humans day, so don't kill anyone
Ending Objectives:
- Visit all the exhibits
- Steal the Soulstone, Gem of Mythra
- Steal the Soulstone, Gem of Zazarius
- Steal the Soulstone, Gem of Alphadius
- Steal the Soulstone, Gem of Quagnali
- Make off with the Crown Jewels
- Aquire the remains of the first builder
- Bonus: You grew Rainbow Rose
- Find a way to destroy the Book
- Find a way to stop the Alien Orb
Loot Information:
- Requirements: At least 7500
- Available: 9207
- Accounted For: 8207
Locating the Museum of the Ancients
The Path
You start just inside the southern side of the crater. Near you is the vine
that you used to let yourself down. You are standing on a small path running
east and west. Head east. Remember, don't get too close to the wall as you
may get stuck, but above all, don't fall off! The path spirals down
into the crater. Soon, it will fork. Take the path that leads down (this is
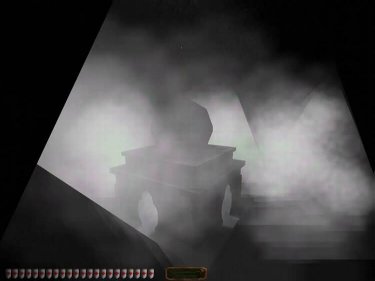
located on the northern side of the crater). Keep following the path until
there is a blue light and a tree below you (figure 1). You should be on the
western side of the crater. Crouch, and walk forward. Once you're falling,
crouch, and hold down the back button (on your keyboard) to slow your
descent.
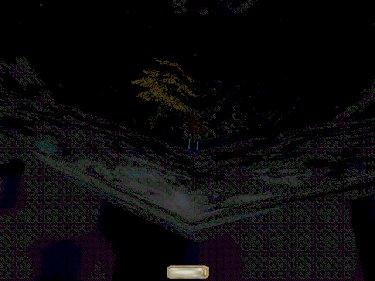
Figure 1
Figure 2
Nemesis
At the bottom of the crater you meet a problem. This problem consists of
a number of Shadow Demons. Have you ever wondered how a guard feels, fighting
an invisible enemy? Now you know. They radiate black smoke, and can be
located this way, but it's difficult. The corpse of a soulstone (such as the
Gem of Oldorf) will make them visible, but in this case it's worse to know
what you're fighting (figure 2).
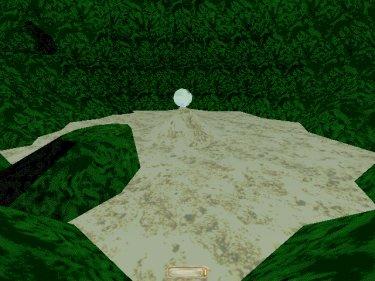
The Caverns
Remember that tree you saw from high above? It marks the entrance to the
caverns. Mantle up into the tunnel (below the tree) as soon as possible. Oh,
and try not to jump out of your trousers if a Shadow Demon catches you. Once
you are in the the caverns, an objective should tick off. Look for a second
tunnel in the near vicinity (figure 3). Follow this tunnel till you reach a
ruined building. Take the gem (100) and return to the caverns. Enter the
Temple of the Ancients, and place the Hand of the Ancients in it's
receptacle.
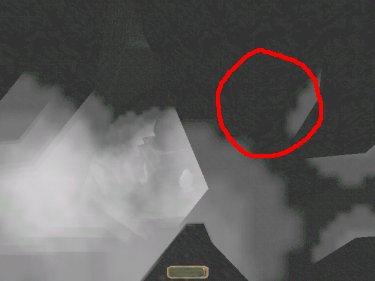
Figure 3
Exhibits 13, 14, 15, 16 and 24
Obtaining the Key
The first exhibit you should visit is the 24th. It is already powered.. Oh,
and don't be put off by the image of the fried ancient. On the north side of
the exhibit is a secret door in the floor. In the wall above, there is a
niche. Mantle up into it and take the invisible key (figure 4). Use it to
unlock the invisible lockbox on the south side of the exhibit. Unlike the
key, this can be partially revealed by the corpse of a soulstone (figure 5).
Return to the (now open) secret door and jump into the service tunnel.
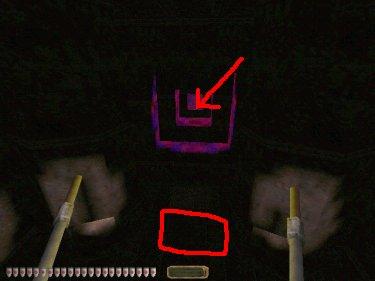
Figure 4
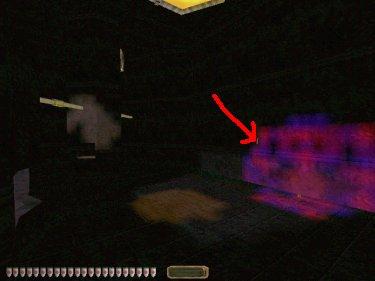
Figure 5
Finding the Stone
As the Caretaker told you, you can use the clear stone to power any exhibit,
therefore, having it is a must. Well, not exactly, if you run out of regular
coloured stones, you can return to this chamber to get some more, but the
clear stone will save you a lot of running about. You can find it in the
power core, just above the service tunnel's other exit. When you grab the
stone, do not surface, or you will never get out again. You must stay
under water at all times. Swim back through the tunnel, and re-enter
the main area. Find the green spiral of gas, and step into it to return to the
museum.
The Other Exhibits
Now visit exhibits 13, 14, 15 and 16. Ignore the warning given to you when
you enter the dangerous and evil exhibit sections, I wouldn't lead you into
danger without telling you first (you hope). Now you have all five soulstone
corpses, we have some harmless visiting to do. There is nothing useful in the
following exhibits, we just go there to satisfy the objective. The exhibits
are numbered 2, 6, 8, 18, 19 and 28. Be warned the some of them have guards,
but they're no problem, just run past them to the gas spiral.
The Corpse of the First Builder
The Amulet
Visit exhibit 26. I should warn you that there is a Muck Tyrant in there, but
he can easily be taken care of with your sword. You will find the Ancient
Amulet in here, as well as some loot (1560 - Total 1660). Then visit Exhibit
10. You should find a bit of loot in the hands of the Olmecs (565 - Total
2225). Now for the crypt. At the back of the small building at the very top
of the pyramid is a wall. Break it down with your sword to reveal a hidden
passage (figure 6).
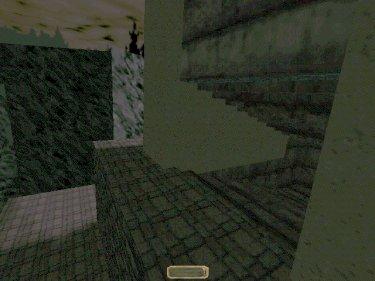
Figure 6
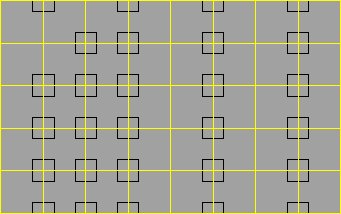
(black squares are safe zones and yellow boxes
are pressure plates)
Figure 7
Cryptic Thoughts
You enter a tomb. Pretty. Full of colours, loot (308 - Total 2533), artwork,
pressure plates, arrow traps... wait a minute! As you may have noticed,
pressure plates controlling arrow traps stand in your way. Luckily the arrow
trap only fire arrows through the centre of the pressure plates. So, if
you're standing in a corner when they fire, you're alright. But not every
corner. there are a few arrows that stray, and so not every corner is safe
(figure 7).So, work your way across following the seam between plate columns
3 and 4. Once you're over there, you can grab the loot.
Stealing the corpse of a God
On the floor is a marble pad. Notice the dark patch? It's made to take the
amulet. Use the amulet on the pad and retrieve the corpse of the first
builder. Now make your way back across the pressure plates, and return to the
exterior of the pyramid.. If you're interested, you should have picked up 20
obsidian arrows. They behave like noisemaker arrows, but they are also very
dangerous. The glass tips shatter on impact, spraying the target with broken
glass.
Loot Collection
Visit exhibit 29 for a scouting orb, a flash mine, and a mine. There are also
3 healing potions in exhibit 23. The loot can be found in exhibits 3 (1125 -
Total 3658), 12 (224 - Total 3882), 17 (1000 - Total 4882) and 27 (750 -
Total 5632). Exhibit 1 does not have any loot, but it has 5 fire arrows which
are helpful in combating the Shadow Demons. Unfortunately, there are two
golden fawns guarding the exhibit, each about a foot tall. It generally takes
5 obsidian arrows to take them both out. Flash-bombs would work too, if you
had any. When they die, they turn into rats (how appropriate). Now visit
Exhibit 20. Run past the two white spiders and grab the gold statuette (150 –
Total 5782).
Into the Mines
Now we come to the most dangerous exhibit of all. Exhibit 21, the Mines of
Montserrat. Follow the included map (figure 8) to the workshop. You should
find some loot in here (400 Total – 6182) as well 2 explosive charges, a
healing potion, 3 mines, 2 flash-mines and an ancient bucket. Now go for the
other loot (150 – Total 6332), discover more evidence that the Shadow Demons
are scary, and finally return to the museum.
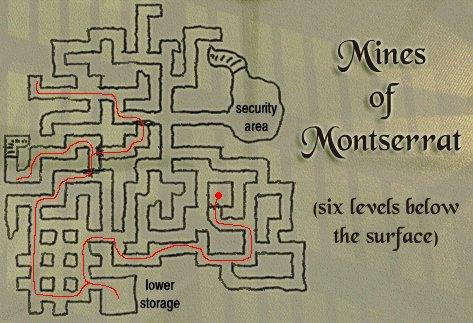
Figure 8
The Crown Jewels
Visit Exhibit 5. There are a number of human guards
here, so be careful. Blackjack them if you want to. Lay the explosive charge
at the gates tot eh jewel cage and detonate it with a fire arrow. Take the
jewels (1475 - Total 7807) and return to the museum.
A Rare Species
Visit exhibit 11. Take the gem that rests on one of the poles (100 - Total
7907).Throw or drop the ancient bucket in the water. When it is filled (figure
9) Pick it up again and visit exhibit 25. Travel down into the sinkhole.
Remember to shoot a rope arrow into the moss pad on the wooden post. Use the
bucket on the earth pad, pick up the now empty bucket and climb out of the
sinkhole using vines, the rope arrow, and the steppingstones around the side.
There is a total of five pads, so you need to make five trips to the fountain
to grow all nine rainbow roses. You get to keep every second one as loot (1000
- Total 8907).
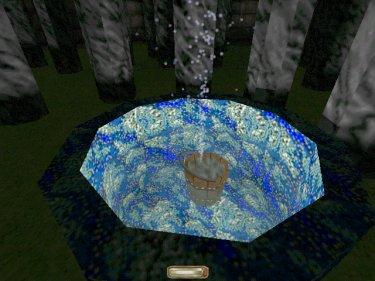
Figure 9
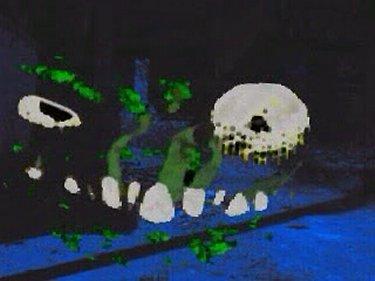
Figure 10
Confrontation
Go to exhibit 7, and take a long look at the face of The Dark One (figure
10). Before you enter the exhibit, know this. He looks at you as surely as you
look at him. Ready your fire arrows and enter the exhibit. Unfortunately for
you, it's an ambush, so unleash your fire arrow at the source of the black
smoke. Once the Shadow Demon is dead, contemplate your situation. The book you
carry is his last foothold in this world. He has sent his servants, the Shadow
Demons, to kill you, and take back his property from your corpse.
Stalked
Grab the loot in the exhibit (300 - Total 9207) and then return to the museum.
Visit exhibit 22, and then exit the museum through exhibit 9. Heed the
caretaker's advice and watch your step. In your absence more Shadow Demons
have arrived, and one guards the tunnel leading to the crater. Take it out
with a fire arrow, and travel up the tunnel.
Traversing the Crater
Your destination is another tunnel on the western side of the crater. Yes,
you're on the eastern side, and The Dark One's Shadow Demons stand between the
two. Remember you only have 3 fire arrows, so make every shot count. Also
remember that the tunnel goes into the mound in the centre, not out into the
surrounding rock like the tunnel you currently occupy.
Destruction
Walk to the very edge of the pit, look at the orb, and throw the book into
it. (figure 11)
Hard Climb
Now it's time to get out. You have many angry Shadow Demons waiting outside
for you. Yuo need to evade them and get to the south side of the crater. Once
you're there, run up the seam, and climb the vine to the path. After that,
it's a simple matter of following the path and climbing the vines, and then
you're out. Out of this infernal mess. No more Shadow Demons!
And After
Many hours later on your trip back to the gypsy village. For some reason
you feel feverish, and extremely hungry. Even though you just had a big meal
an hour ago, you're hungry. You don't feel so good... (figure 12) You feel... thinner.
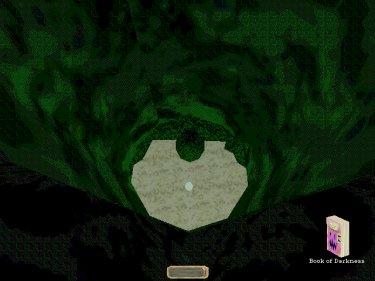
Figure 11
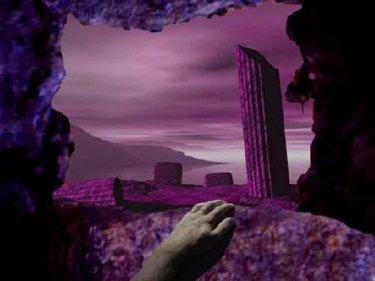
Figure 12