Image 1
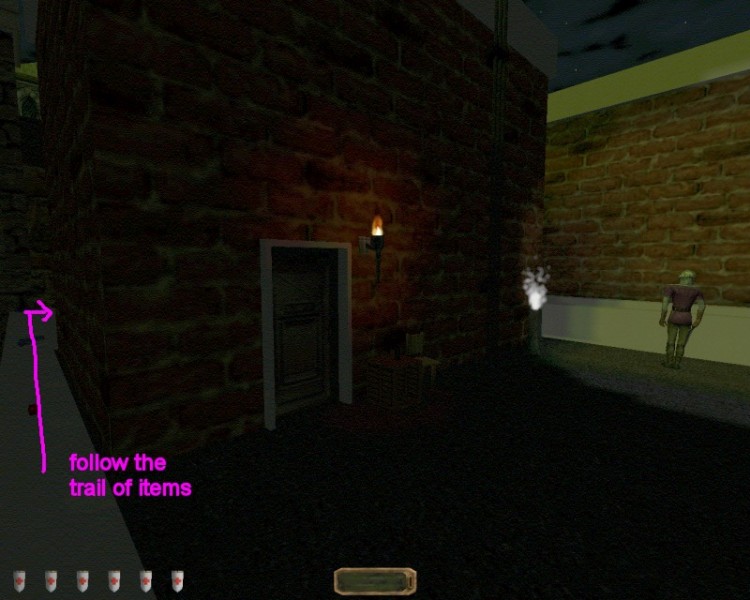
Proceed back outside and pick up the apple and eat
        it. You may regain some health. Follow the little trail of equipment,
        (water crystal, water crystal, moss crystal, moss crystal). Now you
        will be facing West where you can see a Keeper book on the next
        building ledge. Hop to the next building and read the book. Ah! A
        little help from the Keepers. Thanks guys. Open the two shutters of
        this building and listen completely to the conversation involving
        three odd characters. While you listen, you may eat the cheese, the
        apple, and the cucumber sitting on the cabinet just inside the
        window. You may regain even more health. Hop back on the buiding
        ledge and continue West and then North around the corner of the
        ledge. (Note: you may notice a moss crystal on the top of the house
        with the chimney and the parapet, but you probably won't need it, so
        head toward the building with the two balconies (see Image
        2).

Image 2
Run and jump on the top balcony with the flowerbox.
        Open the door and enter the bedroom. The North door opens also. In
        the living room, you'll find a large wooden wirespool being used as a
        table. It has a loaf and an apple. Eating them should bring you close
        to full health by now. Exit the living room into the stair landing.
        Go downstairs and enter the lower apartment. Head into its bedroom
        and eat the carrot in the window sill if you need some more health.
        Go out onto the balcony and make sure the patrol on the streets below
        is out of hearing range. There is a moss arrow in this flowerbox. Hop
        on the balcony ledge and then crouch. Now drop down on the sloped
        corner buttress below. You will bounce to the street below without
        taking damage (see Image 3).
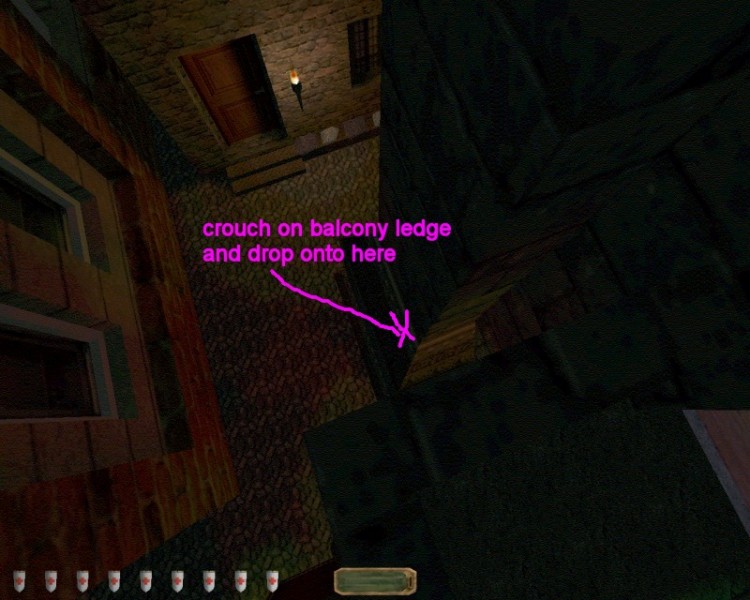
Image 3
Head South between between the red building and the
        house with the chimney to the street with factory sounds then turn
        right (West). There is a moss arrow in the ground level garden at the
        back of the chimney house. Squeeze between the house and the blue
        brick apartment. There is a valuable necklace (130 -total 145) on a
        dresser of the basement apartment. Listen to the conversation between
        the man and the woman about her being sexually harrassed. Head back
        to the area where you bounced down onto the street. Next to the front
        garden of the chimney house is a sewer grate. Go down into the sewer.
        Once you hop of the ladder go South down a tunnel and open the little
        secret door on the South wall (FOUND SECRET!). Activate the switch
        behind the hidden door and return to the ladder. Looking to your
        right you'll see a secret door in the water has opened. Dive in a
        swim West. Near the end is Number 3 from the strange conversation you
        heard earlier. I guess he really couldn't breathe like a fish after
        all. At the top of the tunnel is a stack of water arrows. Proceed
        into the room and find your lockpicks and your blackjack (OBJECTIVE
        COMPLETE-Get blackjack). Frob the switch above the table where you
        found your blackjack and proceed through the secret door which has
        opened. Pass along the crates and wait in the dark for the patrolling
        guard to turn his back. Whack him! Proceed upstairs and open the
        metal door.
Away From Your Captors At Last
You are now in the city block directly West from the
        block from which you escaped, which is good because the gates were
        locked from the other side. Standing in the dark in this doorway,
        wait for the patrolling guard to clear out of the area. Hug the wall
        of this building while crouched and turn left (W) all the way to the
        vines on the wall, then hug the wall of the building being guarded by
        the stationary archer. Stand and sneak up behind this guard. Your gem
        should be dark. If the patrolling guard comes along, just stay close
        to the double doors behind the stationary guard and you should be OK.
        Pickpocket the stationary guard's arrow, and whack him. Pick him up
        and drop him down the stairs of the building where you found your
        blackjack. Go back to the open metal door and crouch just inside it
        in the dark, waiting for the patrolling guard. Once the guard walks
        past you heading West, pickpocket his arrow, put it away quickly, and
        head back into the dark doorway. When he turns around and passes the
        doorway again heading back East, whack him and throw him down the
        stairs as well. Go outside, crouch and sneak behind the stationary
        bystander. Blackjack him and throw him in the dark corner opposite
        the porch staircase, opposite the sewer grate (see Image 4). Open the
        sewer grate and take the ladder down there, where you will find three
        water arrows scattered, and a coin (5 -total 150). Also frob the
        switch to open the gate down there if you
        wish.
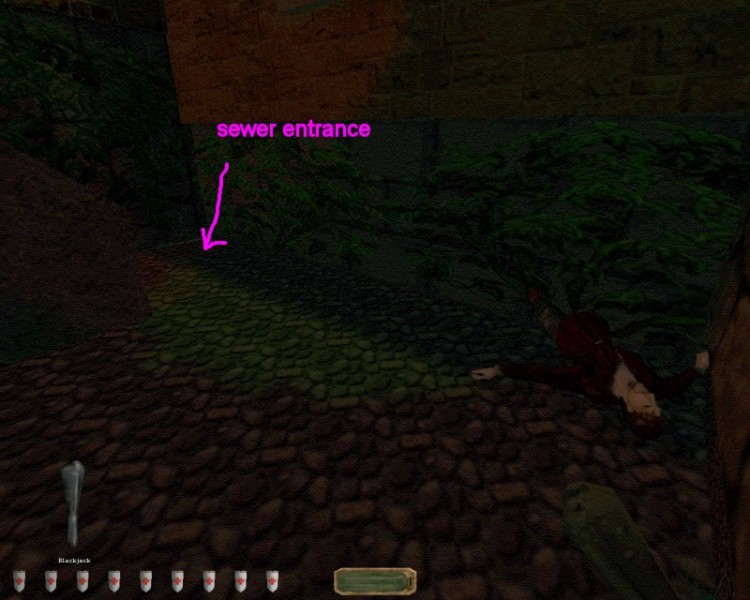
Image 4
Return up the same sewer grate and head to the long
        tunnel, but wait in the dark for the patrolling cop. Blackjack the
        cop and throw him with the bystander. At the Southern most end of the
        long tunnel is a little locked shutter door. Pick it first with the
        triangle pick then the square pick lockpick. Frob the switch inside
        to open the gate, but don't go in there just yet. We'll get there
        later. It's the city block from which you just escaped, and we'll be
        going back. Proceed north down the tunnel. About halfway down the
        tunnel, wait in the dark for the patrolling female cop to come close
        to you then turn her back, then whack her. Drop her in the dark in
        the Southern half of the tunnel. Return to about the halfway point of
        the long tunnel, and when you reach the little connecting tunnel,
        turn left (W) towards a red brick building.
The CityWatch Rest Station and Environs
Note the CityWatch banner on the short grey stone
        building to your left (S), and a small archway in that building. If
        no patrols are approaching, proceed through that archway, stopping to
        read the note on the door inside the archway. It seems Number 1 and
        Number 2 from the odd animal sounds conversation you heard earlier
        got taken in by CityWatch for their odd behaviour. Around the back of
        this rest station are window shutters that can be easily picked. Read
        the note about cleanliness, but pay particular attention to the note
        about strange activities on the roof of the Grunder Inn. Remember
        this note and its details about shooting arrows. Grab the healing
        potion on the desk, and the coins (10+10+5 -total 175). You are
        finished back here. Now face West where you are standing. See that
        outside basement staircase? Go down these stairs and look on the
        ground between the two buildings, and you'll find a little wooden box
        with a purse (25 -total 200) and read the note about being extorted.
        Hmm... Someone is being taken for their
        money.
Leave this area, and go back into the long tunnel the
        same way you came. Continue to the Northern most part of the long
        tunnel and pickpocket the arrow from the patrolling female archer
        cop, put it away quickly, and hide in the dark. When she is headed up
        the stairs, whack her and dump her in the southern part of the tunnel
        with the other cop. Run back to the northern most part of the tunnel
        and pick the blue wooden door. Open the next blue wooden door inside,
        but stay out of the line of sight of the doorway as you do so. There
        is a guard in the next room. When he turns his back, blackjack him.
        Proceed through the next wooden blue door and up the staircase. Pick
        the lock on the brown door and run into the dark part of the room
        near the vault. Read the note on the desk. Solve the puzzle. READ NO
        FURTHER. This will give you time to solve it yourself if you like.
        Inside the vault you will find five items of value (25+12+20+50+50
        -total 357). If you wish to know the code to the vault without trying
        to solve it yourself, then the code is 6572. Run into the dark corner
        near the other desk and turn of the desk lamp. Read the note on the
        desk. Ah! This must be where the lady having the conversation with
        her husband about sexual harrassment quit her job. Now read the note
        in the trash. Odd... Mr. Greider doesn't seem like a stickler for
        decorum at all.....My people in this part of town are certainly
        displaying some odd behaviour.
Exit this building the way you came and back to the
        tunnel. Proceed up that staircase near the doorway and don't be seen
        by the other guard patrolling the outside of the vault building (the
        one you just robbed). Knock this guard out while his back is turned
        and drop him with the other guard who was guarding the building from
        the inside. Back out to the tunnel, but instead of heading back up
        the stairs, turn right. Get close enough to the guy conversing with
        the prostitute to pickpocket the key on his belt, but don't be seen.
        Hide in the dark and let the conversation play out. Let him walk away
        without anyone being alerted. Knock out the prostitute without
        alarming her and drop her with the two guards who were guarding the
        vault. (When you knock her out, stay in the dark and lean forward
        before whacking her). Return to where the prostitute conversation
        took place.
You'll notice a funny shaped green stone covered
        porch with a window opening on either side in its walls, and at the
        top of the porch an archer guard is standing guard at the double
        doors. (A SAVE GAME is a good idea about this point, on top of a
        quicksave). Face the open window of the porch area squarely, looking
        straight ahead. Press yourself against the wall, then back up a quick
        half step. Hop and go forward, looking straight ahead. The guard may
        say: "Who's there?", but if you've done it right and drop into the
        dark bottom step in the corner quickly, you're safe. Even if he
        searches a little, give it a chance before reloading, he may give up
        and head back. Stay close to the wall and sneak up behind him.
        Pickpocket his arrow and his purse (10 -total 367). Knock him out and
        drop him in the dark bottom step where you were
        hiding.
Head back to where the prostitue conversation took
        place and wait for a patrolling cop to come by. Pickpocket his purse
        (15 -total382), whack him, and drop him with the archer guard you
        just knocked out. Now back to where the prostitute conversation took
        place, and head West between the Parker Building and the red brick
        with the bars on the windows (the narrow street the cop was
        patrolling). Now head toward the patrolling female cop and knock her
        out. Notice the Pub sign on the building in that area. Read it. Ah!
        The Grunder Inn! The police report you read earlier said there was
        someone on the roof of this building shooting arrows, remember? Keep
        it in mind. While you're standing under the Pub sign, look East. See
        the ramp going down between the two buildings? Go between these two
        buildings, but not down the ramp. Stay close to the wall of the South
        red brick building without falling down the ramp. Go to the end
        towards the iron fence, and notice the last window is open. There is
        a valuable bottle of wine on the cabinet inside that room (25 -total
        407). Go back to the pub sign and turn left (S). There is a weed
        clump at the far end of the road between the two buildings near a
        downspout that has a stack of two moss arrows. Grab them. Now look
        West. See the porch steps? Head that direction but don't take the
        steps. Squeeze between the steps and the Grunder Inn to get behind
        the Grunder Inn. About halfway down the length of the Inn, you'll see
        steam coming out a vent. There you will find a gas crystal. Now go
        back to where the prostitute conversation took place. While you're
        standing there, face South and notice you can see the little archway
        in the CityWatch rest station. Head towards there but stop just short
        of it and use the key you pickpocketed during the prostitue
        conversation to open the wooden door in the red brick building on
        your right. Mr. Prostitue Insulter is standing in there with his back
        turned to you. Whack him and pick the little lockbox on his cabinet
        to find a silver coin stack (12 -total 419). Leave and head back to
        the prostitue conversation area, go into the tunnel and up the stairs
        to the area where you knocked out the vault building patrol a while
        ago.
Eastern City Block
Across from the arches of the vault building you will
        notice an outside staircase headed to the basement. Proceed down
        there and open the door. Wait for the patrolling guard to be out of
        view, then walk in the doorway and hug that dark corner just inside
        the doorway. Your gem should be dark. (NOTE: The threshold of this
        doorway is very noisy stone, so tread softly). Prepare your blackjack
        and lean forward. When the guard returns, frontal blackjack him when
        he is close enough. Sneak up behind the kitchen girl and knock her
        out too. There is a gold plate in the sink (10 -total 429). Enter the
        farthest barracks (W), lean forward, and knock out the sleeping
        guard. The locked footlocker contains a rope arrow. Go to the next
        barracks (E) and lean forward and knock out that guard as well. The
        locked footlocker contains a flashbomb. Leave this building and go
        back up to street level.
Head East along the the wall of the North apartment
        buildings that has vines on the walls in the little alcoves. In the
        most Easterly little vine clump is a moss arrow. This little alcove
        is a good place to hide in the dark waiting for the two patrolling
        cops to walk by. Knock out the sword cop and dump him in the dark in
        this little alcove. Wait also for the patrolling archer cop and
        pickpocket his arrow. Whack him and hide him with the other cop. Now
        continue East to the end of this building where this apartment and
        the most Eastern apartment meet (you'll notice a tranformer in the
        corner covered by a little roof). Head south to find an archer
        guarding this Eastern apartment up on the porch. Quicksave where you
        are standing in the screenshot (see Image 5).
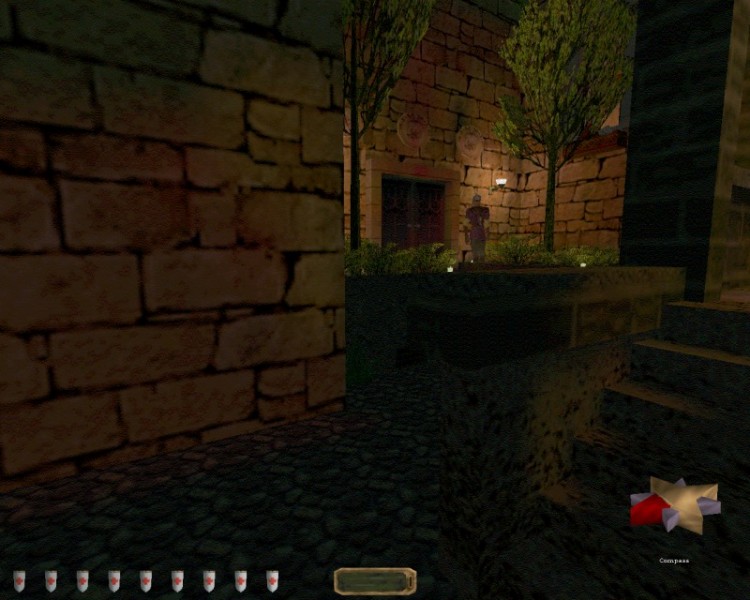
Image 5
Crouch and sneak over to the stone wall of the porch
        in front of the closest tree. Face the cement wall of the porch
        squarely, looking directly ahead (see Image 6). Press against the
        wall, then do a quick half step backwards. Jump and go forward at the
        same time, then run straight to the back wall, then behind the
        archer. You may have to reload and try again if he sees you, but if
        you are quick and quiet, you can do it.
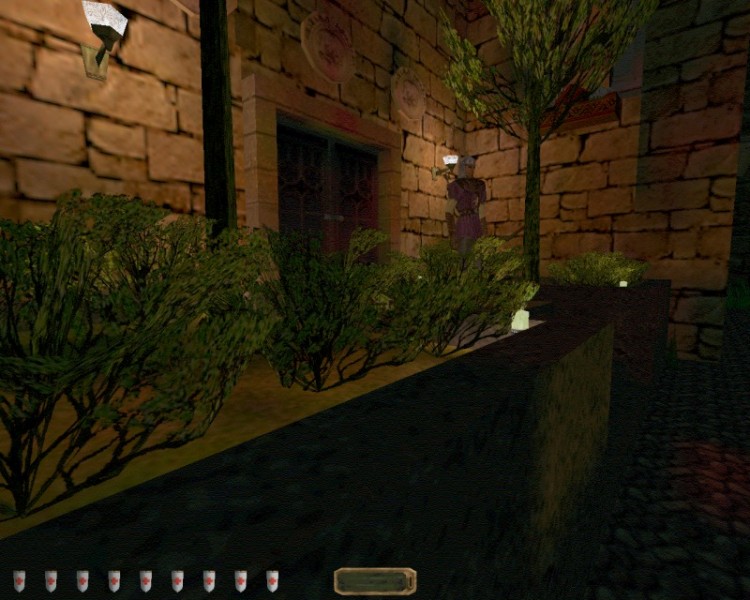
Image 6
Pickpocket his arrow and whack him. Hide him in the
        bushes at the back wall. Climb the tree outside the snoring man's
        apartment window (NOTE: If you have a hard time with hopping from the
        trees in this mission, shoot a rope arrow into the flowerbox below
        his window). Jump in through the window and knock out the snoring man
        who may have stood up by now. The South bookcase has a hidden switch
        shaped like a book. It is on the bottom shelf, far left side. Frob
        the book and the ancient hammer display will move aside revealing a
        metal lined compartment in the floor (FOUND SECRET!). Read the letter
        hidden below. Hmmm.....what evil has the administrator of the asylum
        been committing? Grab the "donation" purse which corresponds to the
        details in the letter (150 -total 519) (NEW OBJECTIVES-BONUS! You're
        doing alright for yourself during your little research mission).
        Leave out the window from which you entered, down the tree, down the
        porch, turn left (S) and into the little tunnel you are now
        facing.
Go quietly into the gate station, lean forward and
        knock out the sleeping guard. Open the little shutter and frob the
        switch to open the gate. Stand in the tunnel in the dark, facing the
        open gate, and wait for the patrolling female cop to come by. Knock
        her out and dump her in the dark gate tunnel. Now go out and get the
        guard standing in front of the double doors nearby. Stay close to the
        wall and you'll stay out of his line of site. Bring him back into the
        dark gate tunnel and drop him there. We won't go back to this area
        yet. Go back out of the gate tunnel into you are in the Eastern city
        block again, and notice the guard at the double doors. You can get
        behind him if you crouch and stay close to the walls. You'll have to
        stand in the light to get behind him, but he probably won't alert.
        Knock him out and drop him also in the dark gate tunnel. Go back and
        crouch to get as close as you can to the innocent bystander nearby.
        He will probably start searching, but knock him out and hide him in a
        dark corner before he alerts the guard up on the porch nearby (see
        Image 7).
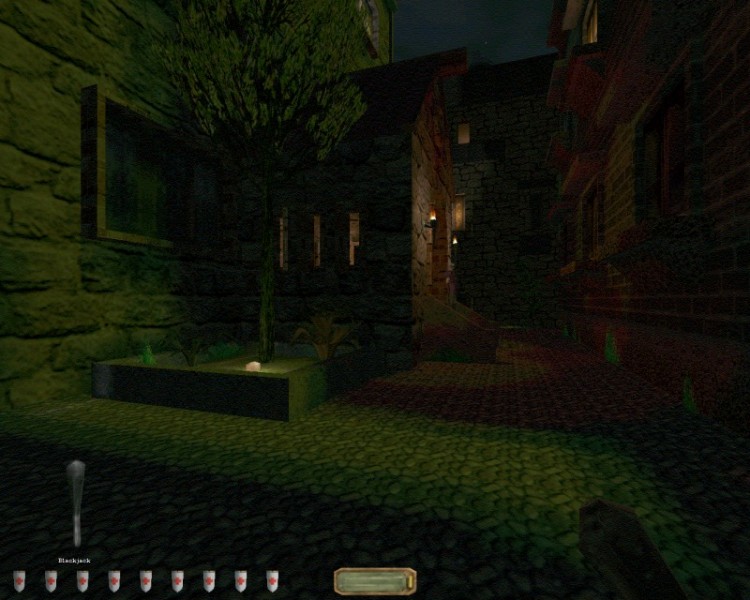
Image 7
Proceed to the porch area in Image 7. Frob the light
        mushroom and destroy it. Stand on the ground next to the porch, hop
        to get the archer guard's attention, then run back into the dark
        behind the tree. Let him search for you. When he gives up and heads
        back towards the porch, pickpocket his arrow and his purse (10 -total
        589). Once he settles down on the steps again, do the hop to get his
        attention again, and go hide in the dark. Let him search for you, and
        when he gives up and turns around, blackjack him. (NOTE: If while
        searching for you, he gets too close to you, lean forward in the dark
        and frontal blackjack him). Hide him in the dark. You may at some
        time during this part of the game so far, notice a male innocent
        patrolling, wearing white pants and a green shirt. Knock him out at
        any time it won't alarm anyone, and hide him in the
        dark.
You will notice a large beam jutting out of the peak
        of the roof over the porch where the archer was just standing. You
        may climb the tree here, then hop on the top of the window sill, then
        onto the roof, then climb up to this beam. If you have a hard time
        with hopping from the trees without taking damage, it is just easier
        to use a rope arrow and shoot it into the front of the beam as
        demonstrated in Image 8.
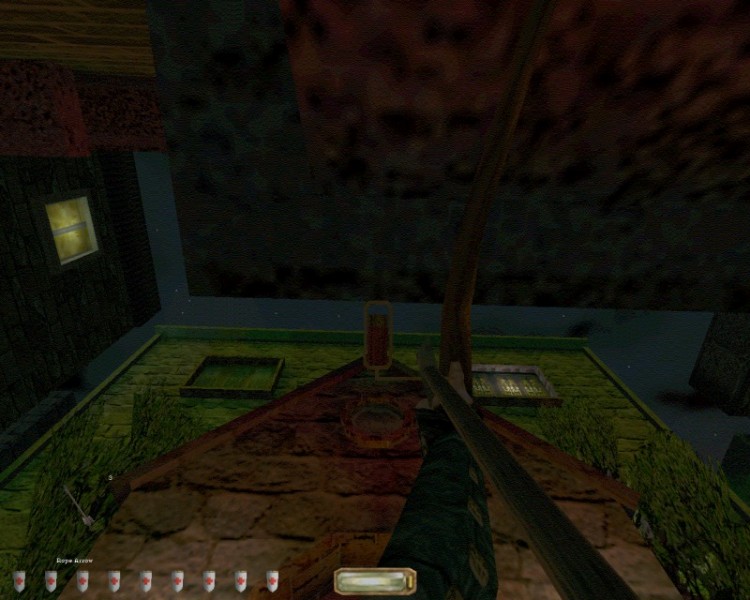
Image 8
Climb up the rope and retrieve your rope arrow.
        Standing squarely on the beam, hop and land, making sure you make
        good footfall noises, then quicksave.With your back against the wall
        of this building, run the length of this building and jump to the
        window sill of the building toward which you are running. (NOTE: Look
        straight ahead, not down at where you want your feet to land). Jump
        again to the next sill with the open window, and enter the room once
        you make sure you can't hear a patrolling guard nearby. (See Image
        9).
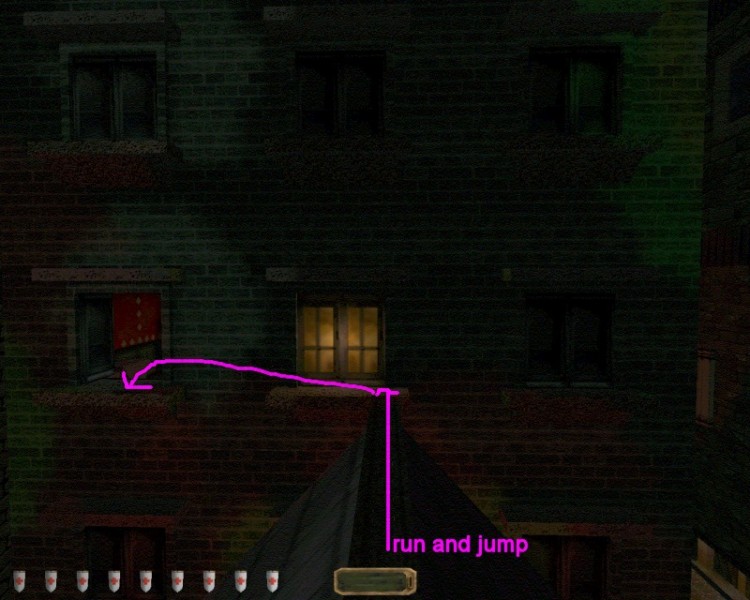
Image 9
Pick the locked door in the room using the square,
        then the triangle lockpick. Wait in the dark corner near the doorway
        for the patrolling guard to enter then whack him from behind. Be sure
        to grab the two goblets from the top of the cabinet (15+15
        -total619), then head upstairs. Crouch to approach this locked door,
        and pick it using the square, the triangle lockpick. Stay crouched
        and proceed directly to the North wall of the room. The lady
        shouldn't notice you. Sneak up behind her and knock her out. To the
        right side of the desk where she stood is a little switch near the
        wainscotting. Frob it (FOUND SECRET!) and take the healing potion
        from behind the painting which has moved aside. Don't miss the coins
        (5+5+20+20 -total 669). This is a good place for another GAME
        SAVE.
Hop out onto the window ledge of the open East
        window. Stand as far to the North as you can on this ledge, with you
        back against the wall and jump to the window ledge directly across
        from you. Remember, look forward, not where you want your feet to
        land (see Image 10).
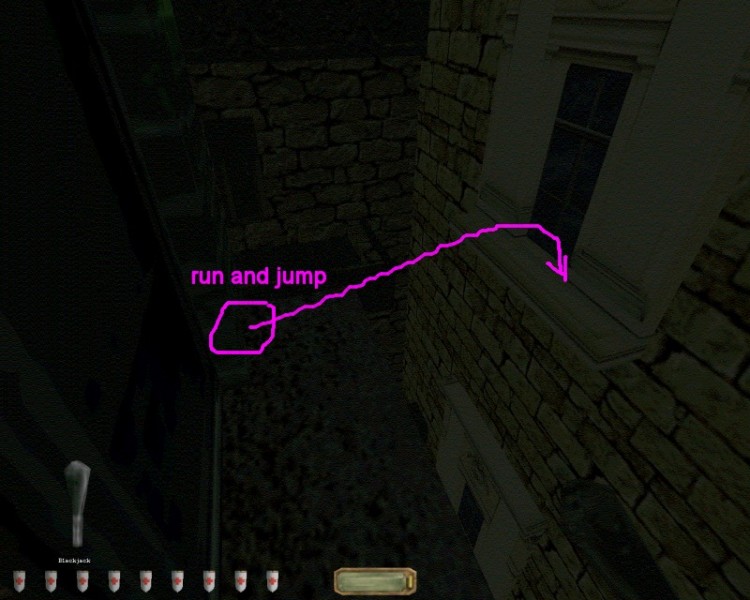
Image 10
Once you are safely on this ledge, you will need to
        hop onto the roof with the metal moulding and head West to the last
        window. This is a matter of dropping down to the short roofs, then
        hopping and mantling up to the taller roofs. Once you are safely
        across all of these little roofs, you will notice that the last
        window is open (see Image 11).
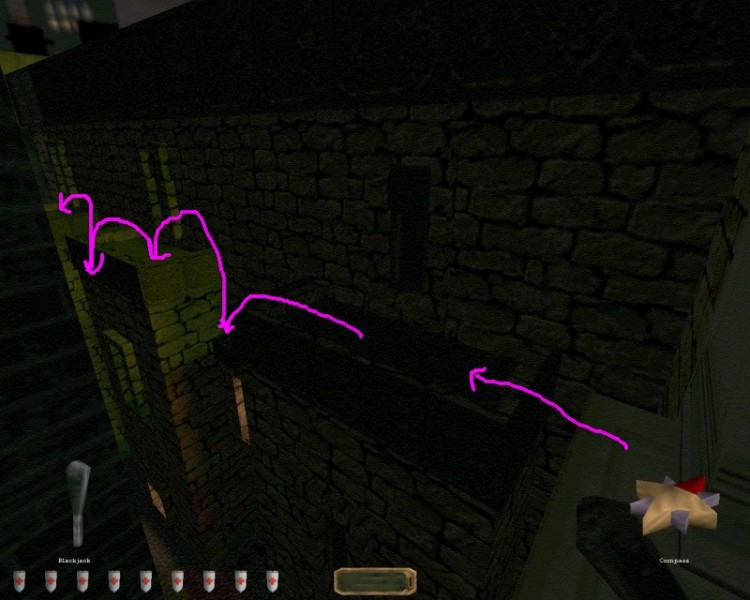
Image 11
Hop through this window into the ladies' bedroom and
        knock her out. She has a nice little gem ring on her night table (25
        -total 694). Exit and hop back onto all those little roofs the way
        you came, but when you get to where you hopped from the window ledge
        of the north apartment, drop down onto the top part of the window
        sill of the storey below. Then face the little transformer roof, and
        crouch and drop on the metal fan cowl, then crouch and drop down onto
        the transformer roof, then down to the street. You should be able to
        do this without taking any damage. Now head back towards that
        basement kitchen area (see Image 12).
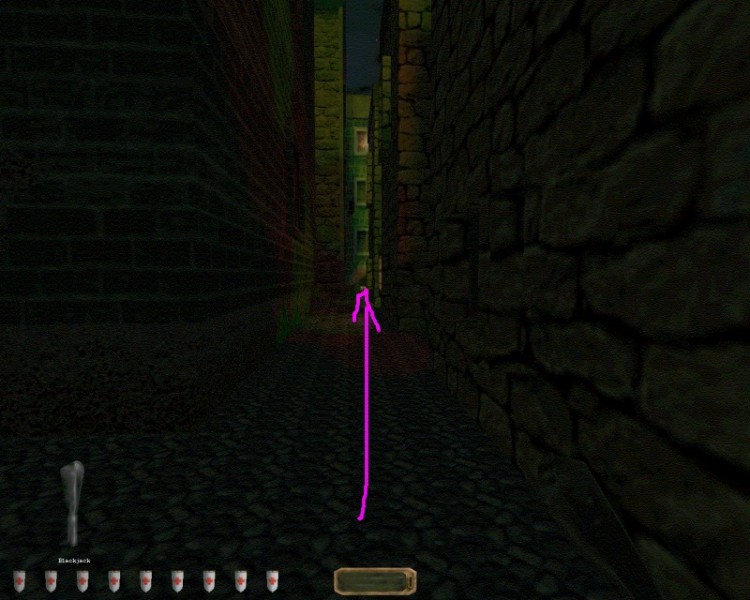
Image 12
As you get to the corner of the apartment where you
        just found the ring, look right (N) between this apartment and the
        vault building with the arches. You will notice a wooden door that
        has a plaque which reads: "ALL DELIVERIES TO FRONT DOOR". Pick this
        door open using the square lockpick and then the triangle lockpick
        (see Image 13).
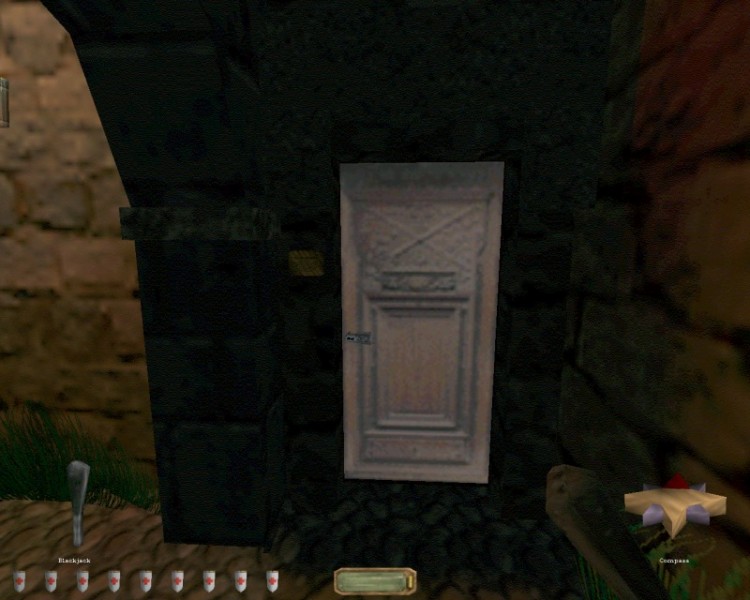
Image 13
The Route to The Upper Areas
Once you pick this door, enter and head directly
        forward toward the door that reads: "REFUSE COLLECTION ROOM". Climb
        on top of the garbage and put a rope arrow into the wooden ceiling.
        Wait for the sound of the patrolling guard to leave. Open the door
        above you, climb the rope arrow and go into the office immediately in
        front of you. Turn off the light and stand in the back at the doorway
        next to the desk. Get out your blackjack and wait for the guard. When
        he comes in the office then turns his back to leave, run out and
        whack him. On the office cabinet is a little loot statue (15 -total
        709). Retrieve your rope arrow and enter the MAINTENANCE ROOM.
        Standing in the doorway of this large room, you will notice a large
        metal grate near the ceiling. You have already used three of these
        grates in the mission thus far, so you should suspect that this one
        may open as well, and you would be correct (see Image
        14).
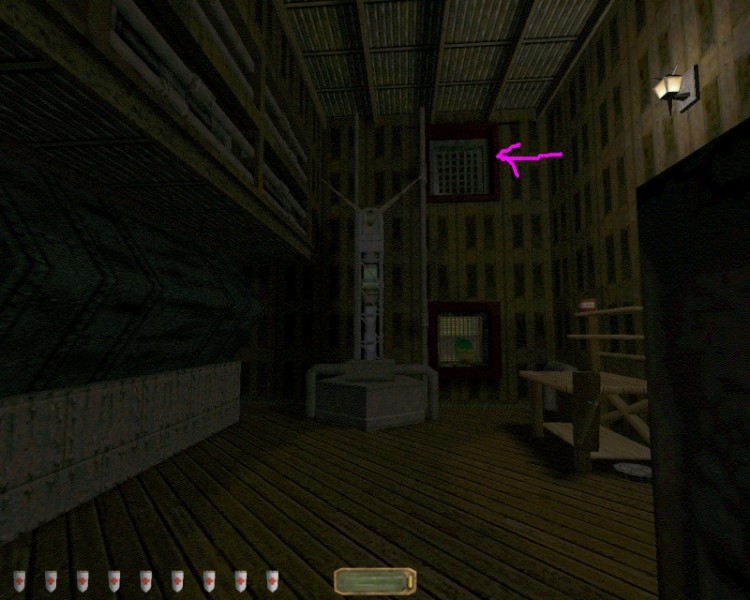
Image 14
You exit out this grate using a rope arrow, but first
        look behind the water tank to find the little area where the workers
        sneak off to have a beer and play a quick card game. Get the loaf,
        the cheese and the two apples from inside the little wooden crate.
        Eat some or all of these food items if you still need a health point
        or two. Grab the two coin stacks as well (5+5 -total 719). Proceed
        out onto the grate and walk on the gargoyle and over to the top of
        the window ledge and then down onto the porch roof (see Image 15
        & 16).
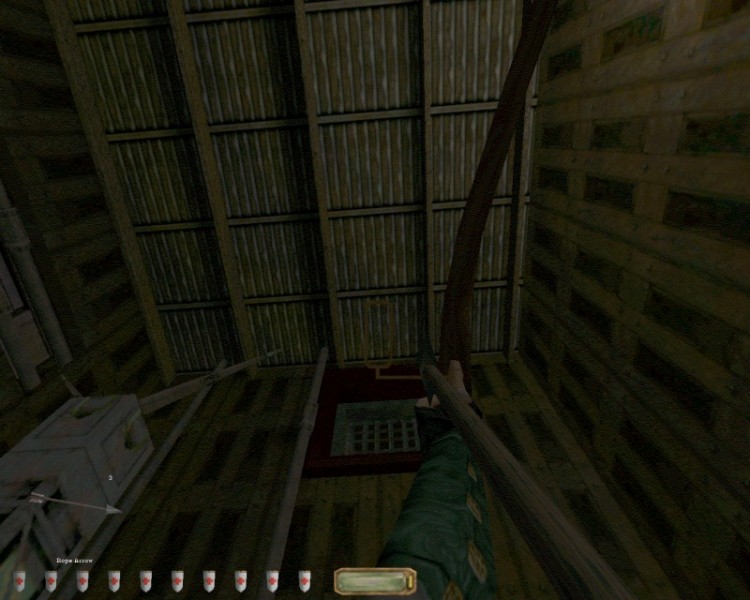
Image 15
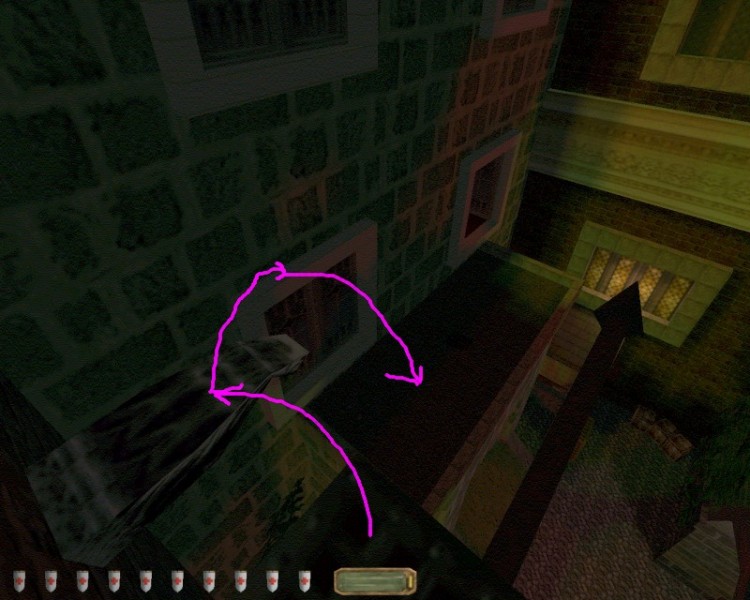
Image 16
Once you are on this porch roof, you will see an open
        window with a noble standing in a nice living room. We will go in
        there in a few moments, but before we do that, we will go all the way
        down to street level and explore there first. You never know what
        you're going to find. Look over the edge of the roof on which you are
        standing, and on the red brick building you will notice a sloped roof
        covering a basement staircase. Shoot a moss arrow onto that roof to
        make your landing on it quiet, so the archer down there won't go on
        alert (see Image 17).
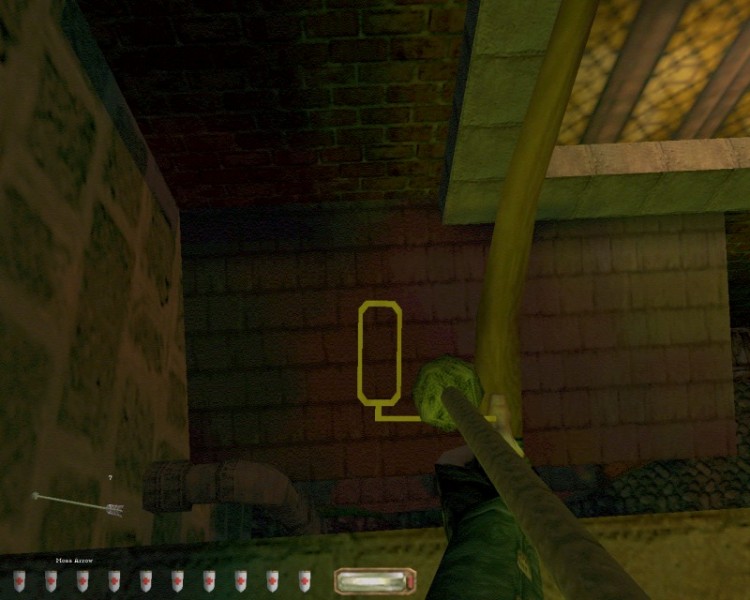
Image 17
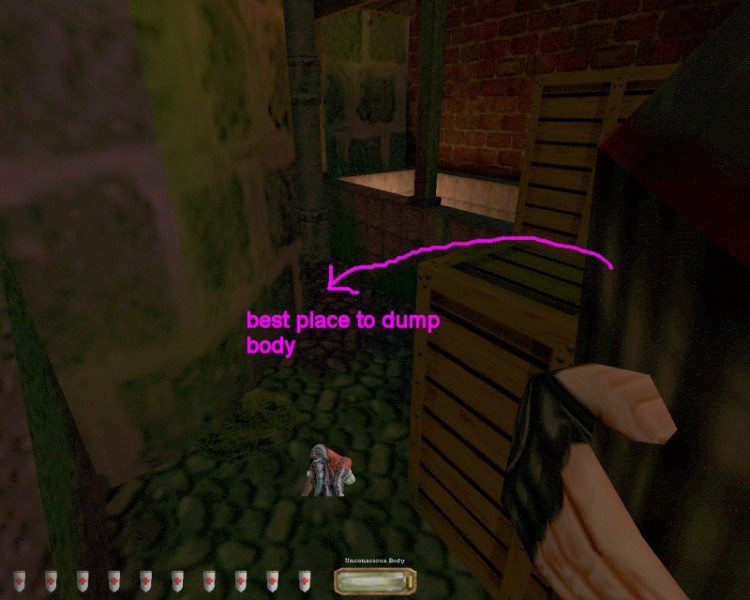
Image 18
Get back one moss crystal in the vine near the
        basement staircase in this area. Go down those basement stairs and
        pick open the wooden door. Open the door at the end of the hall and
        proceed up the stairs directly in front of you. At the top of the
        staircase is a wooden door to the right. Enter this room containing
        brewing vats, and read the plaque under the painting. Ah! Grubec
        Ale... Now find a switch to the left of the desk (FOUND SECRET!) and
        watch the painting move aside. Inside the secret compartment you will
        find some pricey spices (40 -total 779) and a jug of Huoma. Hmmm...
        that's the strange drug recipe you read when you got out of your
        closet prison. Is someone drugging the ale? Leave this room and shut
        the door behind you. In the break room near the table are some coins
        on the window sill (5+5 -total 789). A conversation will start in the
        basement. Head down there and hide in the dark away from the door.
        Listen very carefully to this conversation between the thief and the
        cop. The Jacko character of which they are speaking must be the one
        mentioned in the police report you read earlier, shooting arrows on
        the roof of the Grunder Inn. They said the closest he got to hitting
        the switch to open this gizmo door was when he stood on the north rim
        of the chimney and placed the middle beacon light of the antenna
        inside the bottom of his bowsight....Maybe you are a better aim than
        Jacko is. After the thief and the cop leave, be sure to frob the
        switch near the workbench. It will open the grate of the basement
        windows in case you want quicker access to this part of town later
        (see Image 19).
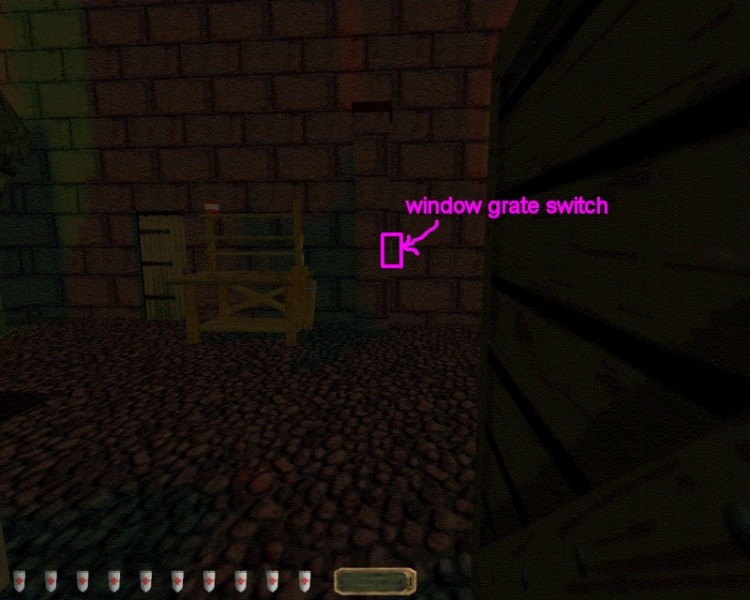
Image 19
Head back up to the breakroom quietly and sneak up
        behind the thief and whack him. Proceed out the door you originally
        picked to get in here, waiting at the bottom of the stairs for the
        patrolling cop to turn his back, then whack him. Weird. A cop and a
        thief with the same boss. Who is this Boss? Hop on the wooden crate
        next to the staircase roof, the hop on the staircase roof, then onto
        the pipe, then mantle up back on the porch roof. Again this can be
        frustrating if you aren't half a step back and not squarely facing
        the wall. Look ahead (see Image 20).

Image 20
The Upper Areas
Hop through the window up there and knock out the
        noble. Read the note on the table. Hidden, eh? Shoot a rope arrow
        into the ceiling in the SE corner of the living room and look for a
        purse sitting on the moulding ledge up there (FOUND SECRET!) which is
        yours now (25 -total 814). Listen at the door for a guard to walk by.
        When she turns around and starts walking away, open the door and
        blackjack her from behind. Proceed upstairs to the apartment. Enter
        the sleeping couple's bedroom and knock them out. Read the letter on
        the lady's night table. Ah! She is the one who gave the asylum
        administrator the secret "donation" you found under the hammer
        display! Oh, her poor sister. What an
        injustice!
In the Bonsai Sequoia planter you will find a water
        crystal and a rock which moves aside. Grab the coins under the rock
        (5+12 -total 831). Proceed to the dining room, and grab the two
        apples and the plum on the table. Also grab the two goblets and the
        wine from the side table (25+25+50 -total 931). Head out onto the
        porch roof outside the dining room window. Good place for another
        SAVE GAME. Hop onto the buttress of the Parker building, then onto
        the ledge of the red brick (see Image 21).
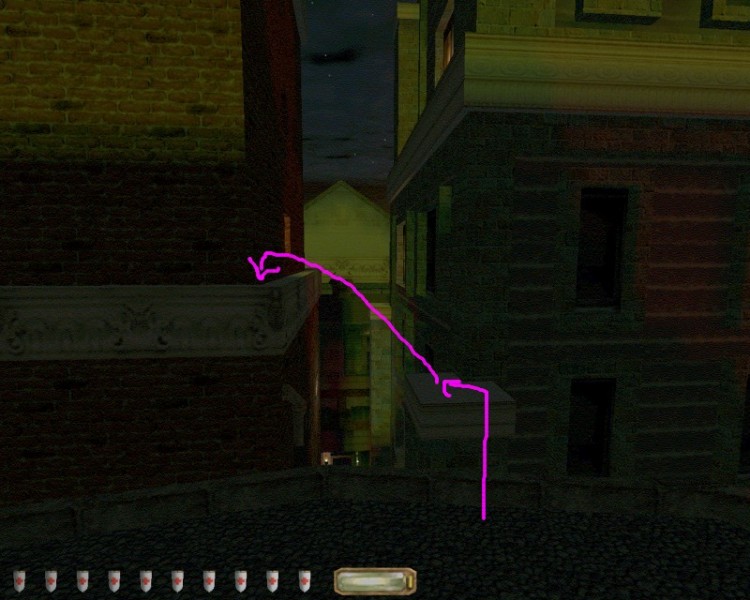
Image 21
Proceed West on that ledge toward the Grunder Inn,
        but grab the ring and the necklace through the open bedroom window on
        your way by (50+150 -total 1131) (NEW OBJECTIVES-BONUS!-Over 1000 in
        gold on a night when you didn't plan any thievery! Man, you're the
        best!) Give yourself a good running start and jump North onto the
        other buttress of the Parker Bldg. Make sure to hop once you land to
        make sure you have good footfall sounds. It shows your not stuck in
        the Dark Engine glitches. Good place for a quicksave. Shoot a couple
        of moss arrows on the roof of the Grunder Inn, with one especially
        aimed near the chimney (see Image 22 and Image
        23).
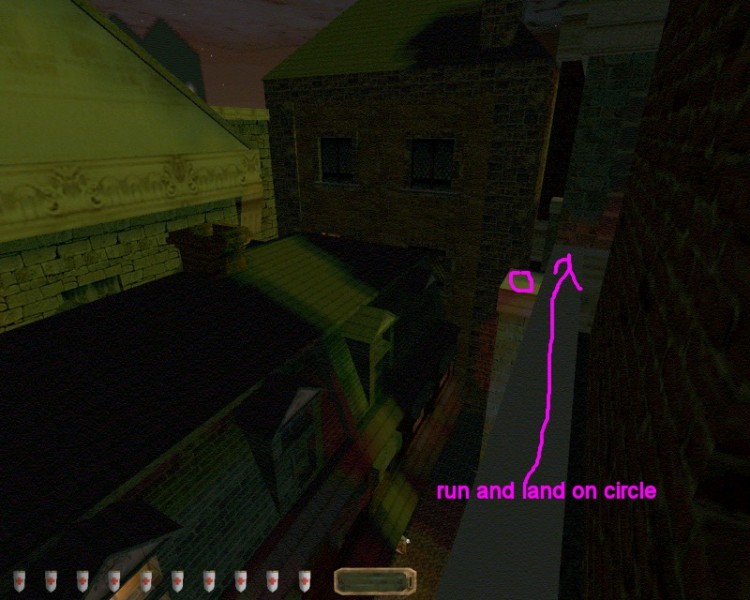
Image 22
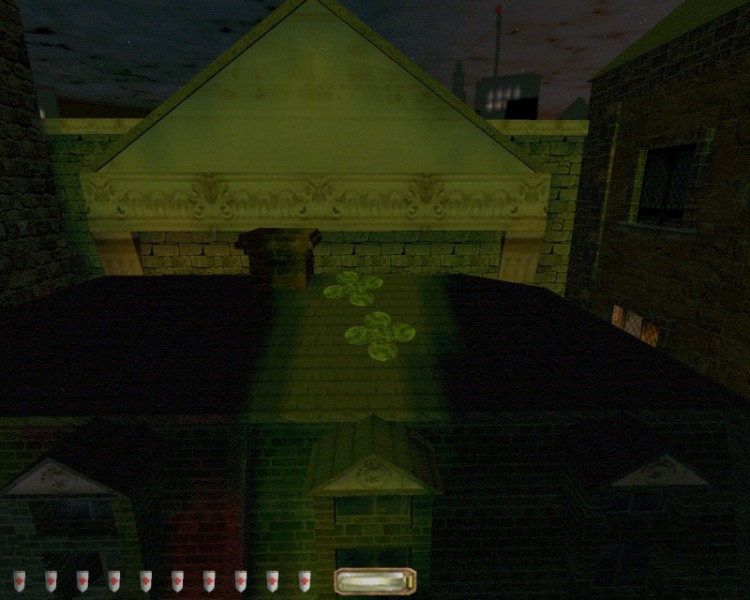
Image 23
Back up on the buttress as much as you can, then run
        and jump directly toward the gable roof over the window in front of
        you at the Grunder Inn. Look straight ahead. Do not look down where
        you hope to land. Hop and stand squarely on the North rim of the
        chimney, just like the thief told the cop Jacko did. Aim a broadhead
        at the antenna, and make sure the middle beacon light of the antenna
        is inside your sight, just at the bottom of the sight, just like the
        thief said (see Image 24 and Image 25). Let fly. The bottom light
        will go out and you'll say: "Ah! Got it!" if you hit the button. Now
        you know that the locked door to the Boss' mysterious gizmo is now
        opened, wherever it may be.
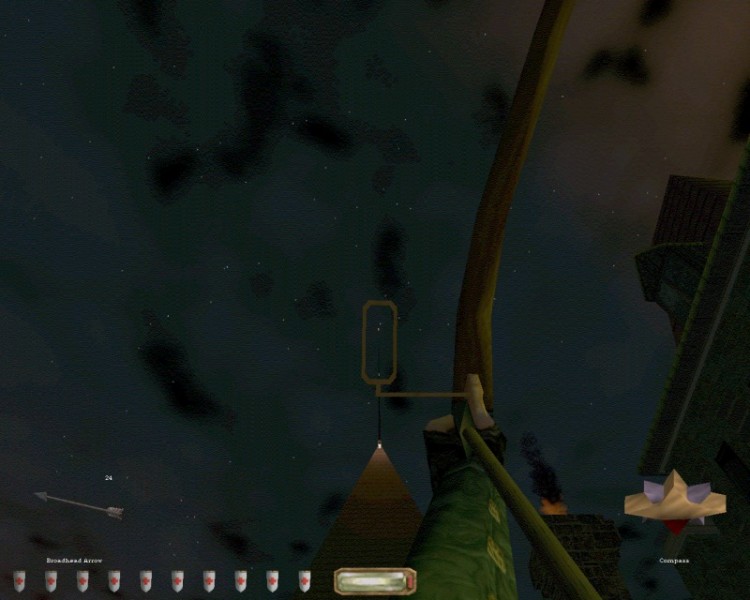
Image 24
Image 25
Now that you've finished that, stay on the chimney
        ledge and turn directly around. Shoot a water arrow straight down the
        chimney to put out the fire, then shoot a moss arrow down there to
        quiet your hop. Go down the ladder and hop off. Crouch, lean forward,
        then come out of the fireplace. Stay crouched and immediately head
        for the desk to the left. If the thief isn't searching for you, this
        is a nice place for a quicksave. Hop over the desk and run next to
        the bed. Read the note. Ah! This is Jacko! Don't miss the purse under
        the bed (25 -total 1156). Hop over the bed, sneak up behind Jacko and
        whack him! Grab the cucumber on the kitchen counter and the water
        arrow in the sink. Head back up the chimney.
The antenna building has an open window. Run off the
        edge of the roof of the Grunder Inn and drop down into this window.
        No need to hop. a run and drop will do. Immediately hide in the dark
        area behind the open window pane and ready your blackjack. When the
        thief walks in the room, wait for him to turn his back and put him to
        sleep. Pick open the metal cabinet door in this room using the
        triangle toothed lockpick. Read all the books from left to right.
        Transmitter instructions? Is this the mysterious gizmo? DISCHARGE
        ROD? Keep that in mind. Hmm.....mesmerism, must be connected. Aha!
        The Boss is a woman! She's looking for revenge on her husband. This
        is the poor woman betrayed by her scumbag husband on their wedding
        day. Hmmm....does she want you for one of her drones? Proceed down
        the hallway...more paintings involving mesmerism. Go into the next
        office and pick the lockbox on the desk. Ah! A spare key to the Boss'
        bedroom. Keep that for a little later. It should come in handy some
        time tonight.
Look around in that same office. Aha! The open gizmo
        door! Glad you hit the switch already, it will save a trip back up on
        the Grunder Inn roof. (NEW OBJECTIVES-Destroy the Boss' transmitter
        to foil her plan!) Well, if the Boss doesn't want anyone going near
        it, like the thief told the cop, you're going to destroy it! Grab the
        DISCHARGE ROD LOCKBOX KEY inside the transmitter compartment and head
        down the basement with it. Knock out the patrolling guard and the
        guard on the ramp. Near the double doors at the top of the ramp is a
        lockbox. Use the key to open it and grab the discharge rod. Bring it
        back up to the transmitter and frob it in place. BOOM! (OBJECTIVE
        COMPLETE-Destroy transmitter) Go back to the room with the open
        window. SAVE GAME.
Only One Roof Trip Necessary
From this point there are still two things to get via
        the roof of the Grunder Inn, but if you can manage this trick, you
        won't need to come back again. It's tricky, but it can be done.
        Here's how:
Don't jump out the window from this point down to the
        ground. If you fail, reload and try again. Hop onto the middle ledge
        of the Grunder Inn (see Image 26). Make sure you heard good footfall
        sounds. If not, reload and try again. Resist gravity while walking on
        this slope by facing toward the wall of the Inn as you walk. Travel
        along that ledge on the West side until you come to an open window
        and walk in that room (FOUND SECRET!) Inside this little bedroom
        you'll find a slowfall potion next to the bed, and a flute in the
        hopechest (50 -total 1206). Hop to hear footfall sounds and SAVE
        GAME. You want to head out the same window in which you entered, and
        walk toward the south on this ledge, resisting gravity once again,
        until you reach the porch roof of the south building. Land on the
        roof and hop for footfall sounds. Shoot a couple of moss arrows along
        the lenght of the pipe running horizontally. Hop on the pipe and walk
        onto the window sill with the open window. When the guard turns his
        back, run in and let him take a little nap with your blackjack. Take
        the four goblets in here (15+15+15+15 -total1266). Hop out the window
        and on to the ground. Head back around the green Parker Bldg and then
        towards CityWatch into the main tunnel and South to the gate of the
        city block from which you originally escaped.
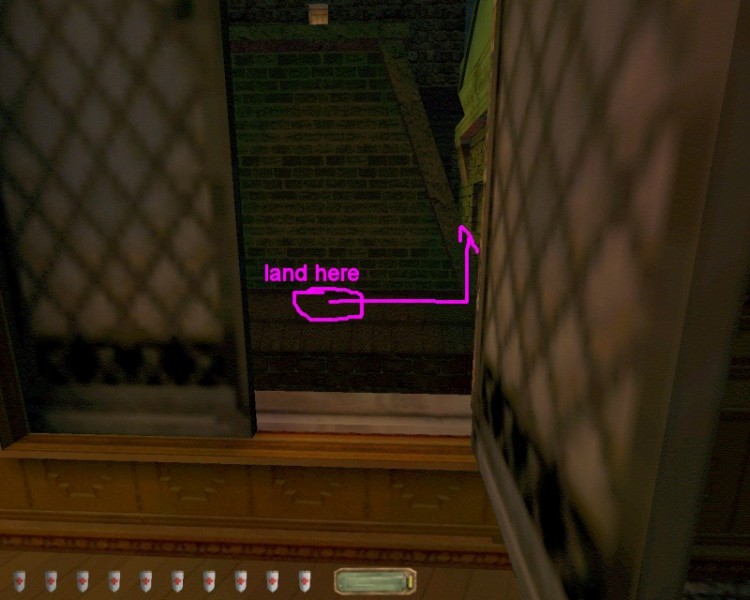
Image 26
Wrapping Things Up
Once you get back to this first area, you'll want to
        get back up to the rooftops. Aim a rope arrow at the flowerbox of the
        lower balcony where you first hopped down to street level (see Image
        27). Climb up the arrow and hop onto the balcony. Retrieve your rope
        arrow and go to the upstairs apartment and out onto its
        balcony.
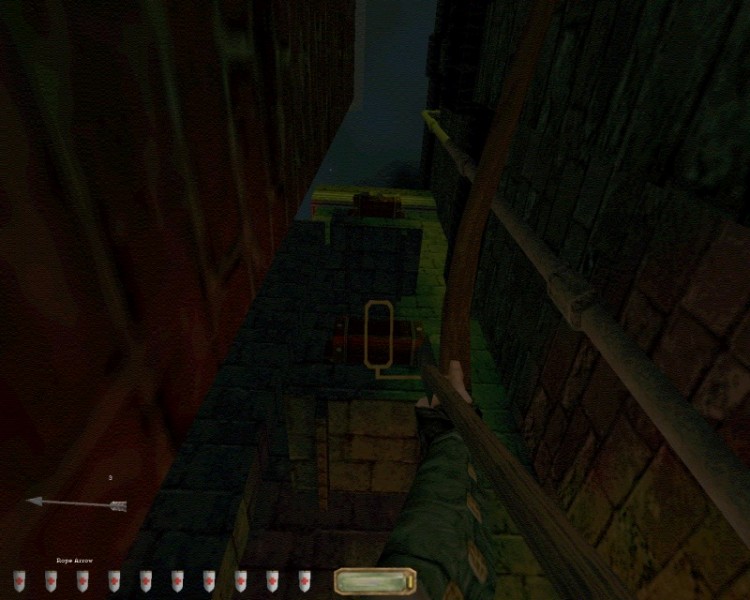
Image 27
The upper balcony is a good place for a GAME SAVE.
        Hop onto the ledge of the balcony, and run and hop onto the white
        ledge of the red brick building directly across (see Image 28).
        Remember, look straight ahead as you run and jump, not at the ledge.
        Once you make it across and know you aren't falling,
        quicksave.
Image 29
Run on this ledge and hop onto the moulding of the
        North bldg (see Image 29). Go through the French double doors and
        enter the bedroom in this apartment. Pick the lockbox to get the
        purse inside (30 -total 1296), then head back out and hop onto the
        white ledge of the red brick building again. Head South and then turn
        the corner to where you heard the strange animal sounds conversation
        earlier this evening. Hop the ledge over to the next red building and
        go around it to sneak up behind the guard outside on the roof. Take
        out your blackjack and make sure he is good and sleepy. Hop onto the
        moulding of the South apartment building again and open the other set
        of French double doors. Put out the gas torch with a water arrow.
        Enter quietly and open the door. Wait for the guard to turn his back
        then run a knock him out. Also knock out the noble who is probably
        awake by now. Get the tapestry from the chest next to his bed (35
        -total 1331). Hop back across to the red brick building and silently
        approach the sleeping guard above the mezzanine. Lean forward and put
        him.....errrr......put him BACK to sleep. If you wish, you may now
        pick the lockbox under the mezzanine to get the noisemaker
        arrow.
TIME TO RE-VISIT THE BOSS' PLACE. Hop back into the
        vents. Head East, and when you reach the turn, head right (S) to the
        first turn, turn left (E) to the end, where you MUST turn left (N).
        Go to the end, where you MUST turn right (E). Quietly up the ramp,
        and when you get to the top of it, you MUST turn right (S). Shoot a
        moss arrow ahead of you to make it more quiet. Pick open the grate in
        the guard's sleeping quarters, then back up so you can still open the
        grate. Back up more so the guard won't alert when you pull out you
        bow. Shoot another moss arrow at the grate opening, just where metal
        floor meets wood floor. Take out your blackjack. By now, the guard
        will have awoken the sleeping guard, but if you haven't alerted them,
        his back will be turned. Wait until the standing guard looks away,
        then run out and whack him and his buddy. Dump there bodies out of
        the line of sight of the door, or the hallway patrolling guard may
        see them when you open that door. Check out the sign on the case of
        beer near the air conditioner. Grubec Ale! These guys have been
        drinking the spiked ale, and the Boss wanted them to give it to you
        too!
Open the hallway door, standing to one side so the
        patrolling guard won't spot you. When you hear him approach, get out
        your blackjack. When he turns around and heads away from you, club
        him. Throw him with the other guards. Now out into the hallway and
        use the Boss' spare key on her door. Run in and knock her out. Get
        the purse out of her hopechest (100 -total 1431). Grab the Exit key
        on her table, and read her book on tests and results. Ha! All of the
        out of character and strange behaviour you've seen in this area
        tonight has been her doing! SO THIS IS WHY THE BOSS WANTED YOU!
        (OBJECTIVE COMPLETE-find out why the Boss' kidnapped you). Time to
        leave her a letter of reply. (NEW OBJECTIVES-Leave her a note in her
        papertray) Select the letter in your inventory and hilight the
        papertray, then frob it (OBJECTIVE COMPLETE). Read the letter by
        frobbing it again. (NEW OBJECTIVES-get out of here) Head down the
        hall, and sneak in and knock out those last two guards, just to make
        the evening complete. Ha! They believe they are still guarding you!
        Use the exit key unlock the last hallway door, down the stairs and
        out the lobby doors (OBJECTIVE COMPLETE).