Water and Lava - Part 3
Room 5 - The Falls
Getting falling water/lava to look natural is a tricky business. The
key to it, I believe, is not to plan every detail meticulously, but rather
to simply rough out the general details and then add brushes that "feel
right" to finish it off. In the demo I have built a lava fall for you to
examine more closely.
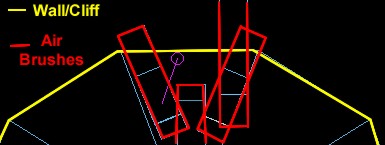
First, build the wall/cliff down which the water is to flow. Mark out
where it is to start and finish, then use a combination of solid and air
brushes (wedges are best) to get the look you desire. Bear in mind that
nature rarely makes things that appear symmetrical or orderly and neither
should you - the only exception would be if you were adding a man-made
construction.
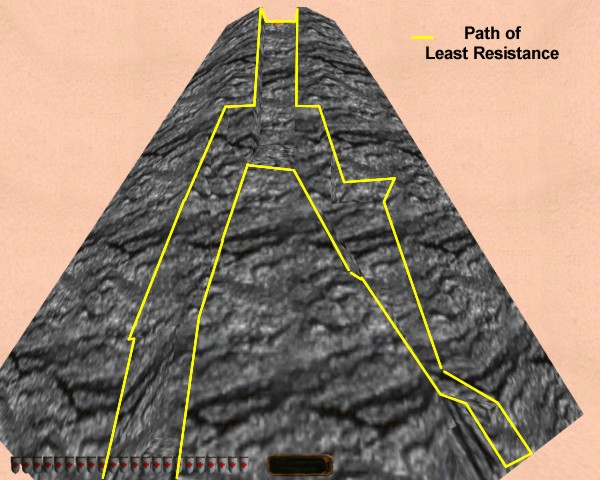
Once you have your wall as you wish, create your water/liquid,
following the path of least resistance. Liquids will tend to follow any
channels that are available, rather than try to create some of their own.
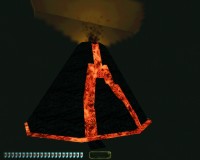
The path of least resistance for my volcano is marked on the image below.
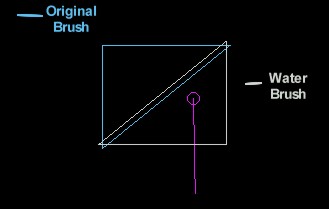
There are now two ways to fill in your water/lava. The first (and
trickier) one is to use a copy of each of your carving brushes, set to
fill flood, rotated so that angled edges face each other and raised
slightly above the original brush.
Alternatively, if you used a large brush to make your wall, you can
clone it and set the clone to "flood", then flow brush each of the
channels of water.
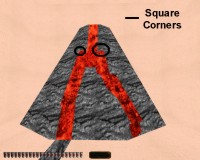
Finally, carefully remove any square corners - with any luck the final
result will be well worth the time spent on it. This a stage I did not
complete for the example volcano, but hopefully you get the idea.
And that concludes the tour of the Water and Lava mission. I hope you
have found it helpful! |